Ongoing work 2020 of which many continues in 2021.
Feedback
Feedback is appreciated so please send an email to enelyalonde@gmail.com or contact me on Thingiverse / Prusa Prints if you have new ideas, improvement suggestions or just want to talk 3D printing.
2020-12-30
While working on the Railway crane I'm also trying to finish some old "TODO's". One was to improve me HotAir Balloon remix a little bit (original design by Gabriel Yun). Almost done now so will hopefully upload it within a day or two.

2020-12-29
The Bathroom is finally uploaded! You can find the print files and some print and assembly information in the Bathroom post.

2020-12-28
It has been a while since I printed or posted anything now so having a long Christmas vacation is most welcome :)
I'm continuing on the railway crane and have now started on verifying that the crane parts are possible to print. So far so good but I have only printed the first part yet, tomorrow it will be exciting to see if the rest prints and if they fit together as planned.

After the crane I will add some props, like a box for storing chains in. I also need to add more lights, make the hatch possible to open and add everything else on a long list of details before this design is done.
Once the outside is done I hope to be able to add some kind of interior but I need to research how that should look like first though.
At least the railway crane looks better than the blocks I started with :)
2020-12-28
I have finally decided to upload the Bathroom set even though the props are not finished yet. Tomorrow I hope to have time to publish it on Thingiverse and Prusa Prints.

2020-10-28
A H0 enthusiast sent me a message the other day with pictures of a bicycle rack he made for my bikes! He had also managed to print several bikes, which I who have a PLA printed still think is amazing even thou I've seen it done several times now.

On top of this he also sent me his design and allow me to upload it since he doesn't upload his designs.
You can find his design here: Thingiverse Prusa Prints
2020-10-17
Progress is currently a bit slow but on the other hand that means my dad has time to send me improvement suggestions along the way. A typical email from my dad can look like below :).

I have only started on some of the suggestions like removing the extended parts on the crane base, updating the crane parts in general and creating a first version of a piston design.

In this design one of the piston parts is meant to be a piece of filament but perhaps this will look way to bulky or might not be printable. Perhaps it's better to create the piston by using a wire instead.
I think I will add som reinforcement to the piston connections as a next step. Maybe also some details for where the hydraulic hoses should be attached is needed. The hoses will have to be created by using wire or thread though.
2020-10-10
Looking forward to some autumn vacation in a couple of weeks where me and my son can spend some time designing minecraft figures together again.
For now I am continuing, however very slowly, with the railway crane. It started out like this:

Then the locomotive cab was added and then some details around the wheels and sides. The sides have a flat backside so that it will be possible to print them as separate parts without support for best possible print. The sides doesn't look done yet but until I have an idea of how to make them look more "finished" I will get started with the actual crane.

So far a base and the first part of the crane have been created. It will be tricky to create something that is possible to print without too much use of support. I will first try to print in parts, and if that doesn't work, switch to printing the crane as one complete part.
2020-09-12
Work is quite intense so the stress relief that 3D printing offers is quite welcome. Started on the railroad crane again. Currently I only have a few mins here and there but thats perfect for creating details of the undercarriage. Didn't get far yet, just started adding a few details.

Maybe it's better to use an existing undercarriage? Not sure it will look good 3D printed, at least not with the not so high level of detail that is possible with PLA filament.
2020-08-31
Ski lift cabin blog post is now posted Ski lift cabin

2020-08-30
Summer vacation ended and work started with a bang. After a couple of weeks of getting back into some routines I have been itching to print something! I started with a more sad thing, a small goodbye present for a college at work who is switching company. My Prusa printer didn't like this downtime either, for the first time ever the filament snapped when I printed the first piece! I am quite impressed that this has never happened before, with my old printer it happened as soon as I didn't print in a couple of days while the Prusa handles old filament perfectly.
So, while the present for my college is occupying the printer I can add the ski lift cabin to Thingiverse (which has gotten quite a lot faster and had several bugs removed lately!) and Prusa Prints.
2020-08-13
A couple more pictures that my dad sent me of the ski lift cabin:
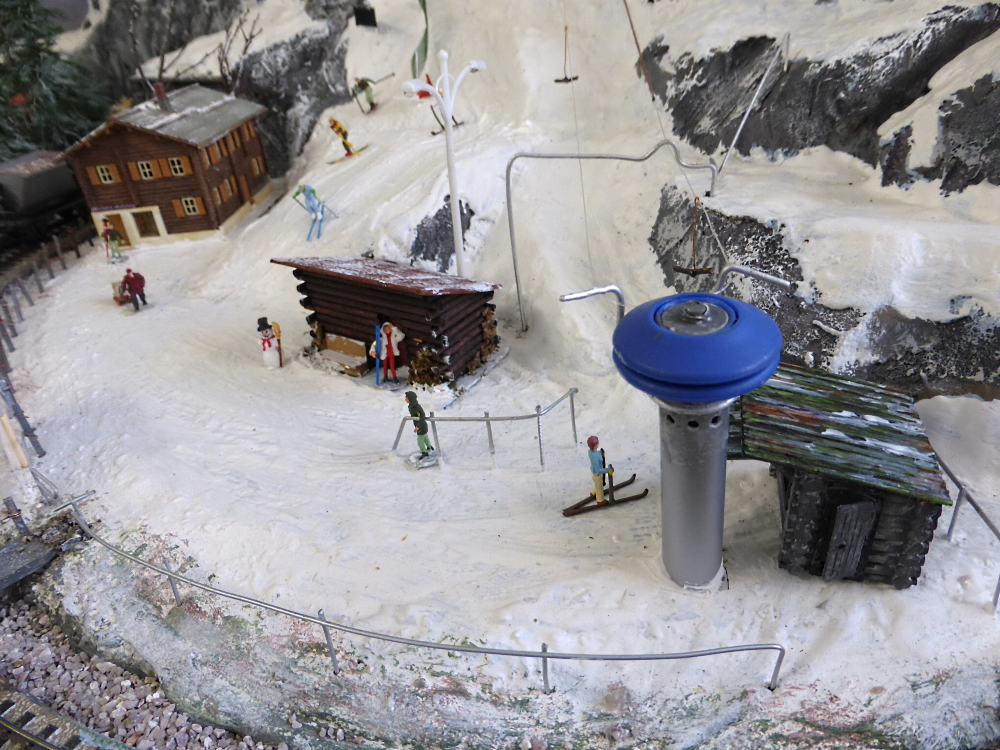
The anchor lift has a motor to make the lift go round and round, perhaps I can make a video of that at some point.
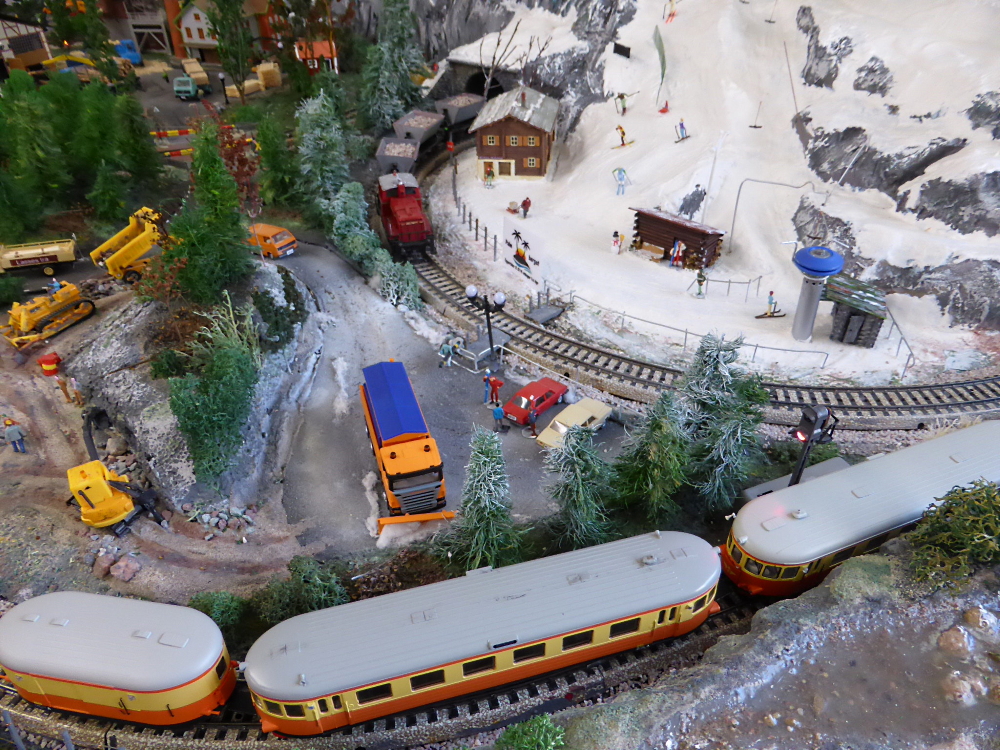
2020-08-11
The bathroom set now has a toilet! The toilet seat and lid are of course possible to fold up and down and as usual I use a piece of filament as hinge.

Not sure about the color of the seat though, looked nicer in my rendered picture so might print another one in another color at some point.

I wonder if the other accessories are printable too?
2020-08-10
While updating the ski lift cabin with textured logs and cracks I printed another old design, the bathroom sink.


It looks pretty ok so the toilet is next to complete the bathroom set.
2020-08-09
Finally some nice summer weather here in Sweden! Just when work starts again …
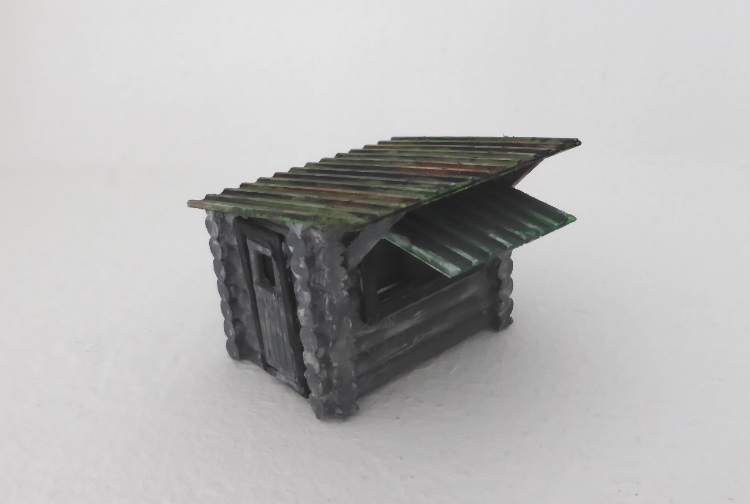
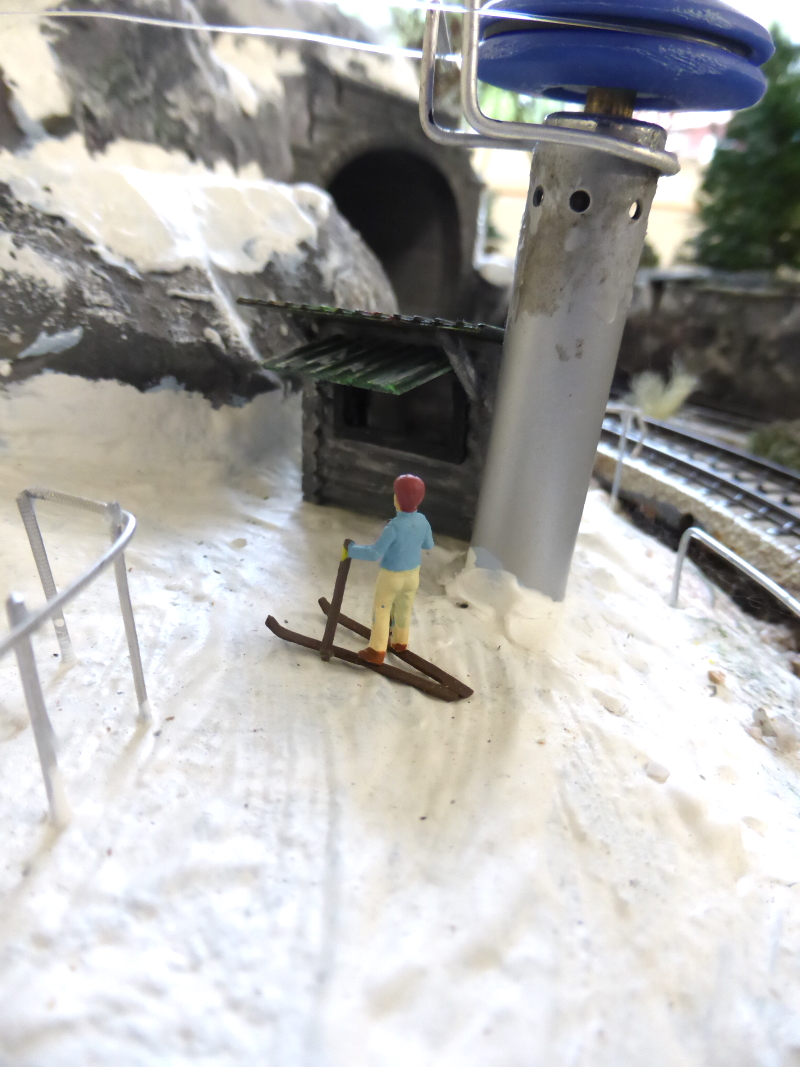
At least we got a couple of warm days in the end and we managed to visit my parents (outdoors at Corona distance) and swim a bit in the lakes close by them. I also brought dad a freshly printed ski lift cabin which he has now assembled and painted. He modified it a bit by cutting and then attaching a bad roof print above the window.
2020-08-06
All parts of the ski lift cabin prints ok but Dad had another improvement suggestion which I thought I'd try. He would like to see some cracked logs since it is supposed to be an older cabin. I didn't think it would be possible to do those tiny cracks but once again the Prusa impresses me and delivers. I have only done a quick test print so far, with only a few cracks, but it definitely looks promising. Will try to also add some rough texture to the logs.
2020-08-03
A short kayaking and camping trip got in the way of tampering with Ski Lift Cabin print settings to reduce stringing. Today, however, I tried lowering the temperature a few degrees but that had limited effect. So next I went all in and both decreased the temperature to 200 degrees Celsius and increased the retraction length to 2 mm. I also changed the fan setting so that it is always on, at least at minimal speed. This worked like a charm and the print looks perfect. Since I changed three settings at once, I don't know which difference each setting made, which is the lessons learned from being impatient :)
I hope to print all parts tomorrow now that the stringing issue has been solved.

2020-07-31
Yesterday I printed the ski lift cabin except for the door and roof which was lucky since dad sent me a design improvement suggestion in the evening :)

Dad suggested to elongate the roof a bit and add support beams. He also made a quick drawing of an updated door design, not sure if I interpreted the drawing correctly but in any case there are a few more details to make them feel a bit more worked through.
I think I will print the support beams separately but will also make a version where they can be printed together with the front.
The roof printed nicely but I have big stringing issues when printing the walls which needs looking into. Perhaps lowering the temperature 5 degrees can work. If that doesn't work the next step is to reduce the nozzle traveling speed.
2020-07-30
Minecraft Snow Golem
Our Minecraft Snow Golem is finally painted! My son made a flat pixel image of the Snow Golem and then we extruded the different colors, so that each color has a unique thickness, to get some texture and painting support. After that the textured images were put together into a Snow Golem and connectors were added between the parts. All parts can rotate including the arms which have ball joints to be able to move in all directions. The pumpkin can ofc be removed to reveal the real Snow Golem face :)
My son wanted the Snow Golem to be placed into a real Minecraft scene so here you can see our printed version in an abandoned village together with it's real Minecraft Snow Golem friend in the background.

The pumpkin head is more orange in reality but turned out brown in the picture for some reason.
Since Thingiverse seems to work again I hope to upload the Snow Golem soon.
Ski lift cabin
Yet another day with rain and today we are not going anywhere so it's a perfect day for printing the Ski Lift Cabin. I updated the roof with a really simple corrugated roof sheet design.

In the version I'm printing today doors, frames and window are separate parts to make it easier to paint the cabin.
2020-07-28
Make
7upMan made a make of the new design of my shed! He verified the new roof design and it looks better than the old one and is easier to handle and print.
I really like his painting of the shed, especially the roof. He said that the color he used for the roof is very thin but also highly pigmented and that this makes it pool in recessed areas and create this light-dark scheme completely effortlessly.

7upMan verified the version with big gaps between the boards in the wall. So now it's just up to me to print the version without gaps and the one where window frames, windows, doors etc are separate parts. I think I might just print the version with separate parts and hope that the other one is ok though.
Only thing left to update in the design is the short side with two doors. I would like to be able to print them separately and still have a bar across…but will that be possible or will the "bar holders" become too clumsy then?
Ski lift cabin
The first wall printed ok yesterday, didn't have time to print more. There was some weird stringing however so I might need to do a nozzle cleaning before printing next.
Not sure if the logs are too big, they are 3,3 mm in diameter which is 287 mm since I use 1:87 H0 scale. However, an old log house probably have pretty thick logs?
Today I didn't get further with the cabin yet since I have now painted the Minecraft snowman (seen below)…or well everything except the arms. I needed a couple of hours to do this so since it's bad weather today it was a good day to do it. I think it took 2.5 hours to paint it! Hope to add a picture soon :)
Thingiverse bug
It seems like everything new I upload is just gone from Thingiverse, or at least from my designs and can't be found when searching. There are several reporting this issue but I haven't seen a response to it. People are speculating that the Thingiverse database is corrupt so I am a little bit hesitant to upload things there right now. If you would like any of the designs I show here under ongoing but haven't yet uploaded, just contact me via email and I will send you the .stl files.
2020-07-27
First version of the ski lift cabin.

Will try to print a wall today to see if it will really look good or if the sides will just melt together.
The roof will get some structure in the next version. I am not so sure about the door design either, might need an update.
2020-07-26
Finally the Brick Oven is uploaded! Read more in the Brick Oven blog post.

So whats next? I have a few unfinished designs left (baking stuff, bakery roof, airplane, railway crane etc) but I think I want to mix in something new now. So next design will be a small ski slope cabin that my dad wished for. After that or in parallell I would like to continue on the railway crane too.
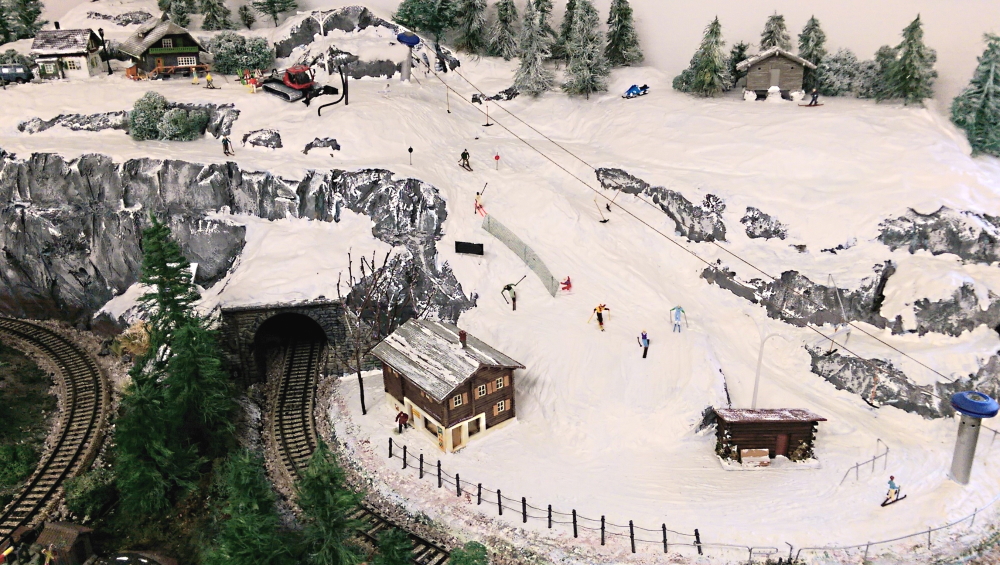
Where he is going to put it I do not understand, looks pretty full…but I am sure he has some idea :)
2020-07-22
While printing parts for the Shed mentioned below I continue to finish all half finished designs. Next up is the Brick Oven for The Bakery and this set will include a brick oven, baguettes, a peel and logs. The hatch is possible to open and close.

The brick oven is sized for a 1:16 or 1:12 scale dollhouse to work with both Sylvanian families, Playmobil and similar.
Once the oven is done the roof is the next part of the Bakery and after that only a possible water wheel is missing. Then there are endless variations of new walls and new shop or home interiors left…this design will never be completely finished. I haven't even started on stacking the houses yet!
2020-07-21
Finally the mailboxes are uploaded!

You can read about the mailboxes in blog post Mailboxes and find files for download at:
2020-07-20
Mailboxes
Upload of mailboxes is almost complete. It felt like something was missing in the old designs which led to a couple of more designs and delayed the upload somewhat.

The flag on the American mailbox is possible to print but perhaps I will increase it slightly before finishing the upload.
Shed
Updated the Shed design mentioned below for two walls today. Now there are inner walls so that the shed doesn't have such a drafty look. The gaps between planks have been increased for better looking prints. Two more walls remains to update. Also tried printing door and window frames separately which worked better than expected.

The door frame and window frame snapped into place nicely without glue.
2020-07-19
Creating from scraps
However much I like to 3D print more or less everything I have to admit that creating things from scraps is also a hobby I admire. When my dad (BISON) grows tired of waiting for my designs, which can take a while at times, he uses parts from here and there and makes really beautiful creations.
One example is the tractor in the picture below. The farmer is taking a short break talking to some visitors. The tractor is of model Bolinder Munktell (BM). I like the details he adds, like that you can see the furrow behind the plow but not before.

Another example is this forwarder which is working in a forrest close to the railway tracks.

2020-07-18
New roof and ridge design uploaded to Thingiverse. It has not been printed yet, will update the wall design first.

It would be nice to be able to print the windows and doors separately and I would like to remove the quite drafty look of the shed…so more updates are incoming.
2020-07-17
Last time I was at my parents I took some photos of my dads model train scenario, including a scene with a mailbox he received as birthday present. He actually got a set of mailboxes but the rest were a bit too dark and would just disappear in the scene so they need a repainting before he can place them. My zoomed in pictures all became quite blurry unfortunately but you can se a yellow dot just outside the side entrance to Faringe train station.

Zoomed in the set of mailboxes looks like this:

The yellow one might look a bit odd but it was actually a quite common design of the official city mailboxes back in the days here in Sweden.
However, my uploading of mailbox files got interrupted by a message in Thingiverse. Someone had noticed that the short sides, of my previously uploaded shed, are hard to print. The more I investigate the model the more puzzled I become. It is indeed not possible to print the short sides since they are not one part as intended, the planks are loose. However I did print them for my dad so I can't for my life figure out how I did it since I seem to have lost the print files which is also a mystery.

I am quite thankful for this feedback of a design flaw and will have a look and perhaps make an overhaul of the shed at the same time. I think I might be able to do a better roof design while I'm at it too. For now only new quick fixed short sides are uploaded.
2020-07-15
Ski slope
My dad just sent me a photo from his 1:87 scale model train scene where he placed a sledge I gave him a while ago. I think my dads ski slope looks really nice so taking the opportunity to share his photo.
 The snow in the slope looks great!
World Globe
Finally the World Globe is done and files are uploaded. You can read more about the globe in The World Globe blog post and also find links to uploaded files.
2020-07-14
Finished the paining of the world globe today. Just need to upload the files now, hopefully tomorrow morning.

The globe makes the study room look more like a study room. Would be a nice prop for a living room too I think.
2020-07-13
Painted the Minecraft snow golem pumpkin head today.

My son, a huge Minecraft fan, thinks I used a too dark color for the stripes and he might be right. For some reason my texture was much more dark and brown than it looks like in the game, will have to investigate that before I make a second head for my girl's snow golem.
The body still remains to be painted, hope to do that during the week.
2020-07-12
The Globe
An idea of creating a world globe popped up maybe two weeks ago. A globe stand was quickly created from parts of one of my old water pump designs.

Once I had a stand I needed to create the globe with a map on. I wasn't sure if I wanted it to be a real world map or just some fake one but in the end I decided to try with a real world map. It was surprisingly simple and I ended up doing it in Microsoft's 3D builder. I created a sphere and used the relief feature with an inverted black and white world map…and voila a world globe was created. Since everything went so fast up until this point I was sure it wouldn't print properly. However, that was not the problem I would run into either.
After cutting the globe in half, both globe halves and the stand and printed nicely. (The picture doesn't make the stand justice, will take a better picture later.)

I had almost finished painting the globe, only the poles remained, when I finally realized my error. I was showing the kids the globe and told them the names of the continents but…I couldn't find Australia! However, the south pole looked very much like Australia…I checked the map I had used when creating the relief and that world map didn't include the poles!
So I have now made a second try…with poles. Since I don't want to increase the size of the globe it means everything is slightly smaller so I am worried it won't look as good printed.

Since I want as smooth as possible surface and as many details as possible I am printing this with a 0.05 layer height which means each half (⌀36mm) will take almost 3h to print.
The Snowman
The last snowman part (the middle section) now prints satisfactory and the kids have approved it's spinning qualities too.

Now I only need to paint it which will be quite the challenge.
2020-07-11
As usual I have started too many designs at once so it's time to finish some. Also, Dad still would like to see my railroad crane so I got some new energy into that now. However, both my kids first would like to see their Minecraft snowmen printed and painted. One version is printed but the bottom part doesn't spin as easily as it is supposed to, according to their feedback.

I have just made a minor adjustment which I will print right now. After that it's "only" the painting left which I am slightly dreading…it will not be easy to get this right I think. So many small squares to cover. If it is done right it will look quite nice … I hope.
2020-07-10
Since I discovered that there already are nice looking railroad cranes on Thingiverse I got slightly distracted by a new fix idea, which is to create an old looking airplane for Sylvanian families. Or rather, it's really for my son's room since he is completely into some kind of jungle theme and would like to have an airplane circling above his jungle. In any case he gave me the idea and it's a quite fun design. The body and wings I think look ok but the tail needs improving. Leaving that for later thought, I am struggling with the propeller right now.

After that landing wheels and cockpit interior designs are next.
2020-07-09
Started creating a railroad crane for dads 1:87 model train scene. First I just made a "block drawing" to get a general design idea and roughly estimates of how big each section will be.

Looks great right? :)
Started on the drivers cabin and got pretty far.

The cabin will be "loose" so it's possible to add people and some interior to it. Dad has commented on the number of lights so I will need to do some updates there but I think I would like to continue with the rest of the crane first.
